Hostinger Business Hosting Setup Guide

Complete Hostinger Business Hosting Setup (Beginner to Live Website)
In this guide, I’ll show you the exact steps to set up your website using the Hostinger Business Hosting plan — no confusion, no skipped steps.
👉 Follow exactly as shown, and your website will be live in 15–20 minutes.
🛒 STEP 1: Buy Hostinger Business Hosting
- Go to Hostinger official website
- Click Hosting → Web Hosting
- Select Business Web Hosting
- Click Add to Cart
👉 On checkout page:
- Select plan duration (choose 24 or 48 months for best pricing)
- Choose Server Location → India (if your audience is India)
- Click Continue
👉 Create account:
- Enter email OR sign up with Google
👉 Payment:
- Add coupon code – For Coupon Code Browse Coupon In our Website and get Latest working discount coupons
- Complete payment
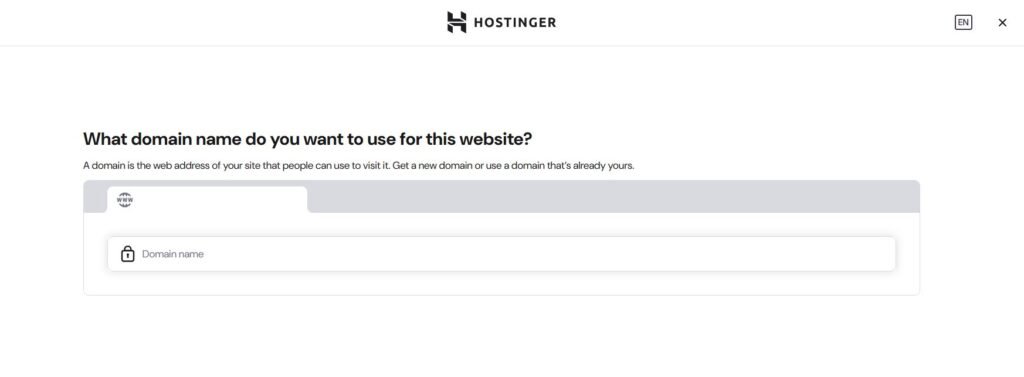
🌐 STEP 2: Claim Your Free Domain
After payment:
- Click Claim Domain
- Enter your domain name (example: yourbrand.com)
- Click Check Availability
- If available → click Claim
👉 Fill domain details:
- Name
- Address
✔ Click Finish Registration
⚙️ STEP 3: Access hPanel Dashboard
After setup:
- Click Manage Hosting
- You will enter hPanel
👉 Main sections you’ll see:
- Websites
- Domains
- Emails
- Files
- Databases
🏗️ STEP 4: Create Your Website (IMPORTANT STEP)
- Click Websites → Add Website
- Select Create a New Website
- Choose:
👉 WordPress (Recommended)
🧩 STEP 5: Install WordPress (Exact Setup)
Now fill:
- Website Title → Your site name
- Admin Email → your email
- Username → admin username
- Password → strong password

Click Next
👉 Choose Application Type:
Select:
✔ Blog
✔ Business
✔ Portfolio
👉 (This only affects starter templates)
👉 Theme Selection:
- Choose Astra OR
- Click Skip
👉 Click Install
⏱️ Wait 1–2 minutes
🌍 STEP 6: Access Your Website
After install:
👉 Click Edit Website
This opens:
👉 WordPress Dashboardyourdomain.com/wp-admin
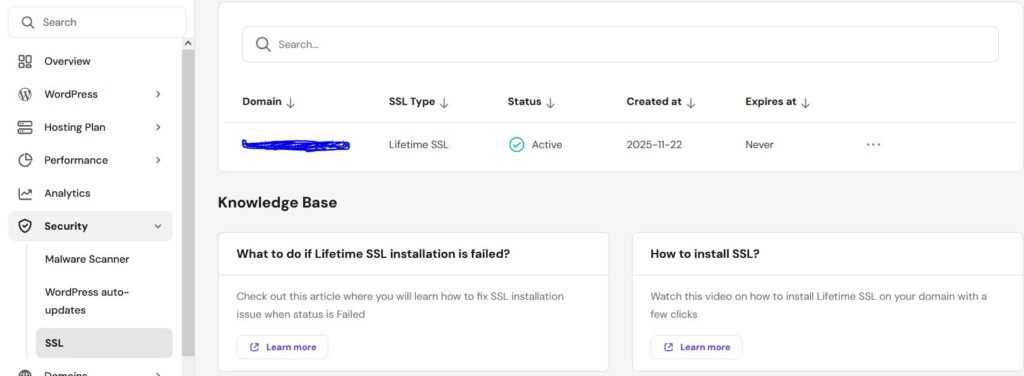
🔒 STEP 7: Enable SSL (HTTPS Setup)
- Go back to hPanel
- Click Security → SSL
- Click Install SSL
- Wait 2–5 minutes
👉 Force HTTPS (IMPORTANT)
- Go to WordPress Dashboard
- Settings → General
- Change:
- WordPress Address → https://yourdomain.com
- Site Address → https://yourdomain.com

Click Save
⚡ STEP 8: Install LiteSpeed Cache (Speed Boost)
- Go to WordPress Dashboard
- Plugins → Add New
- Search: LiteSpeed Cache
- Click Install → Activate
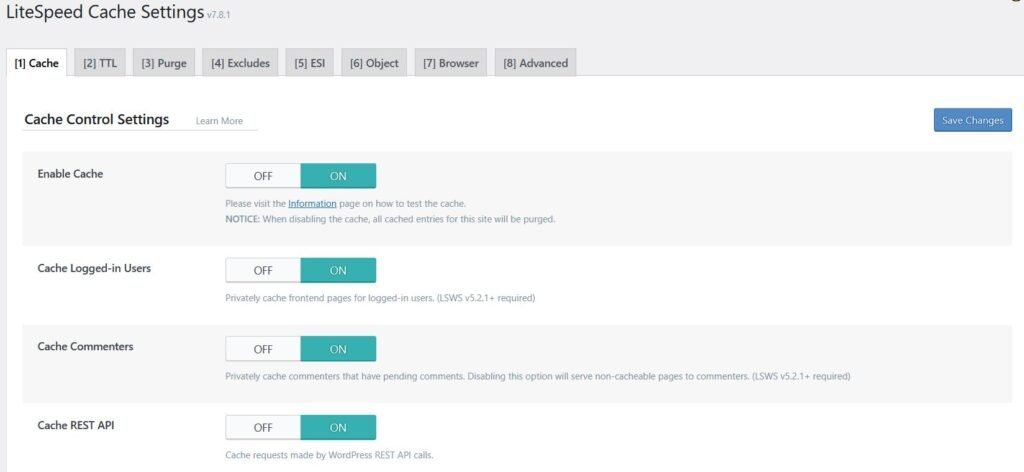
👉 Basic Settings:
Go to:
LiteSpeed Cache → Cache
✔ Enable Cache → ON
✔ Enable Browser Cache → ON
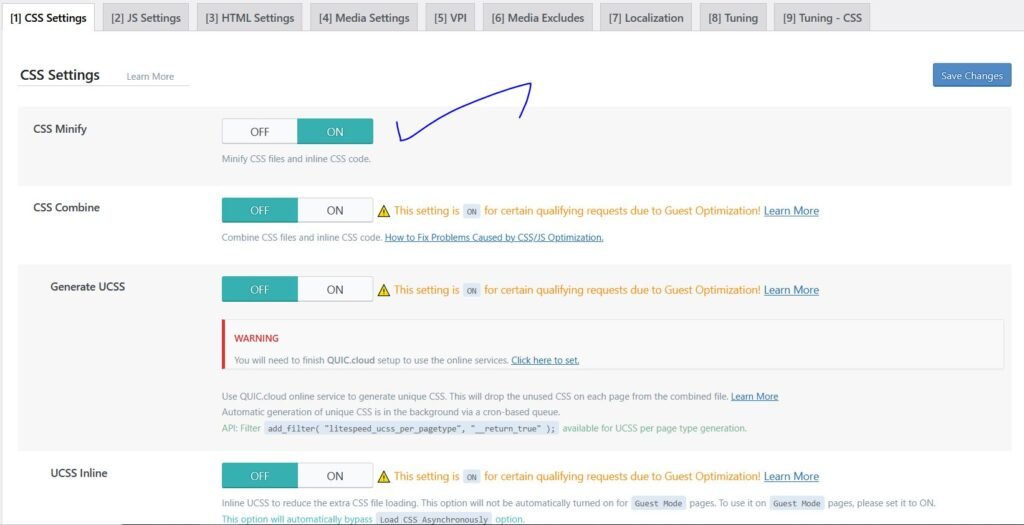
👉 Optimization:
LiteSpeed Cache → Page Optimization
✔ CSS Minify → ON
✔ JS Minify → ON
✔ HTML Minify → ON
Check This Guide – Hostinger LiteSpeed Cache Settings (Best Configuration for Maximum Speed)
🖼️ STEP 9: Image Optimization
- Install plugin: LiteSpeed Cache (already) OR Smush
- Optimize all images
👉 Reduces load time
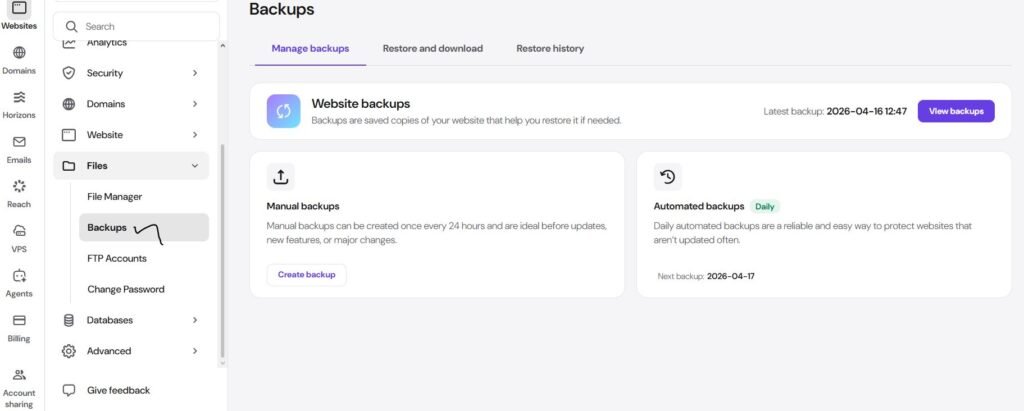
💾 STEP 10: Check Daily Backups
- Go to hPanel
- Click Files → Backups
- Select date → Download backup
👉 Business plan gives automatic daily backups
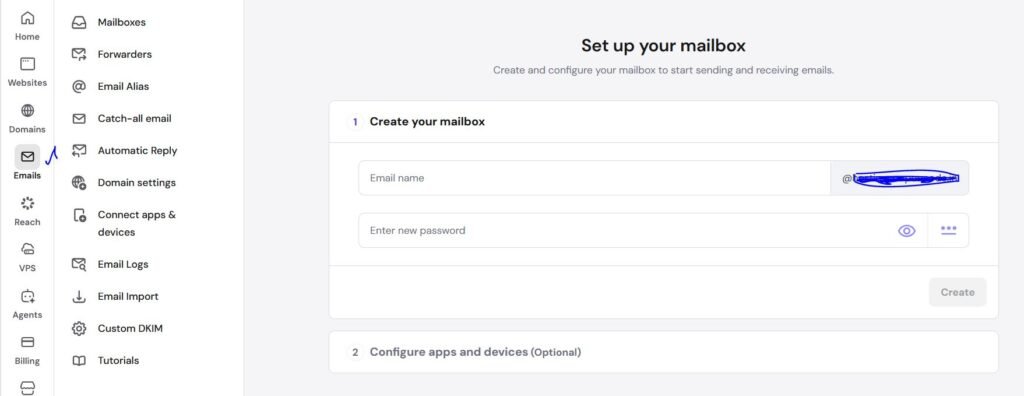
📧 STEP 11: Create Business Email
- Go to Emails → Email Accounts
- Click Create New Email
Fill:
- Email: info@yourdomain.com
- Password
Click Create
👉 Connect to Gmail:
- Use SMTP settings
- Add account in Gmail
Learn – How to Configure SMTP for WordPress (Fix Emails Going to Spam)
🌐 STEP 12: Connect External Domain (If Not Free Domain)
If domain is from GoDaddy/Namecheap:
- Go to Domain DNS
- Add A record:
- Name: @
- Value: your server IP

👉 Wait 5–30 minutes
IMPORTANT – Skip This Step if You Dont Have Domain Outside “this step is only for the users who have domain from other providers like godaddy,bluehost,etc”
🔐 STEP 13: Basic Security Setup
👉 Install security plugin:
- Wordfence OR
- All-in-One Security
👉 Do this:
✔ Change admin username
✔ Use strong password
✔ Enable login protection
⚠️ STEP 14: Fix Common Issues
❌ Website not loading?
✔ Check DNS
✔ Clear cache
❌ SSL not working?
✔ Wait few minutes
✔ Reinstall SSL
❌ Slow website?
✔ Enable cache
✔ Optimize images
🔥 PRO SETUP (ADVANCED – OPTIONAL)
✔ Connect Cloudflare CDN
✔ Enable GZIP compression
✔ Remove unused plugins
🎯 WHO SHOULD USE BUSINESS PLAN?
✔ Growing blogs
✔ Business websites
✔ WooCommerce stores
🎉 FINAL RESULT
After completing all steps:
✔ Website live
✔ SSL active
✔ Fast loading
✔ Secure setup
👉 You now have a fully working professional website
FAQ
👉 15–20 minutes
👉 Yes, better performance + backups
👉 No
Related Post
How to Set Up Hostinger Premium Plan with Domain
Hostinger LiteSpeed Cache Settings (Best Configuration for Maximum Speed)
Hostinger WordPress Optimization Guide (2026 Complete Speed Tutorial)
Save Big On All Hosting Plans With Our Official Coupons – Redeem Now