Hostinger Cloud Startup Setup Guide
How to Set Up Hostinger Cloud Startup Plan (Step-by-Step Guide)
To set up Hostinger Cloud Startup, purchase the plan, claim your domain, install WordPress from hPanel, enable SSL, configure LiteSpeed cache, and connect a CDN for better performance.
| Plan | Performance | Best For |
|---|---|---|
| Premium | Basic | Beginners |
| Business | Medium | Growing sites |
| Cloud Startup | High | High traffic |
When you purchase the Cloud Startup plan, you’re not just buying hosting — you’re getting dedicated resources (CPU + RAM).
👉 But if you don’t configure it properly, you won’t get full speed.
This guide shows:
✔ Exact steps
✔ What each step does
✔ Why it matters
🛒 STEP 1: Buy Cloud Startup Plan (Don’t Skip Settings)
- Go to Hostinger → Cloud Hosting
- Select Cloud Startup
- Click Add to Cart
👉 Apply Coupon
✔ Hostinger Coupon Code Cloud Startup – Redeem Now
👉 During checkout:
✔ Choose 24 / 48 months → lower cost per month
✔ Select Server Location
👉 Choose based on your audience:
- India → fastest for Indian visitors
- Europe → mixed/global traffic
- US → international audience
💡 Why this matters:
Server location affects website loading speed (latency)
🌐 STEP 2: Claim Your Domain (Your Website Name)
After payment:
- Click Claim Domain
- Enter your domain (example: yourbrand.com)
- Click Check → Claim
👉 Fill:
✔ Name
✔ Email
✔ Address
💡 Beginner Tip
✔ Keep domain short
✔ Avoid numbers & hyphens
✔ Prefer .com
👉 This helps branding + SEO
⚙️ STEP 3: Domain Connection (Understand This Properly)
👉 Your domain must point to your hosting server
If domain is from Hostinger → auto connected ✅
If external domain:
Add this in DNS:
- Type: A
- Name: @
- Value: your server IP

⏱️ Takes 5–30 minutes
💡 Why this matters
Without DNS connection:
❌ Website won’t load
❌ Domain shows error
📊 STEP 4: Explore Cloud Dashboard (Most Users Ignore This)
Go to:
👉 Hosting → Manage → Overview
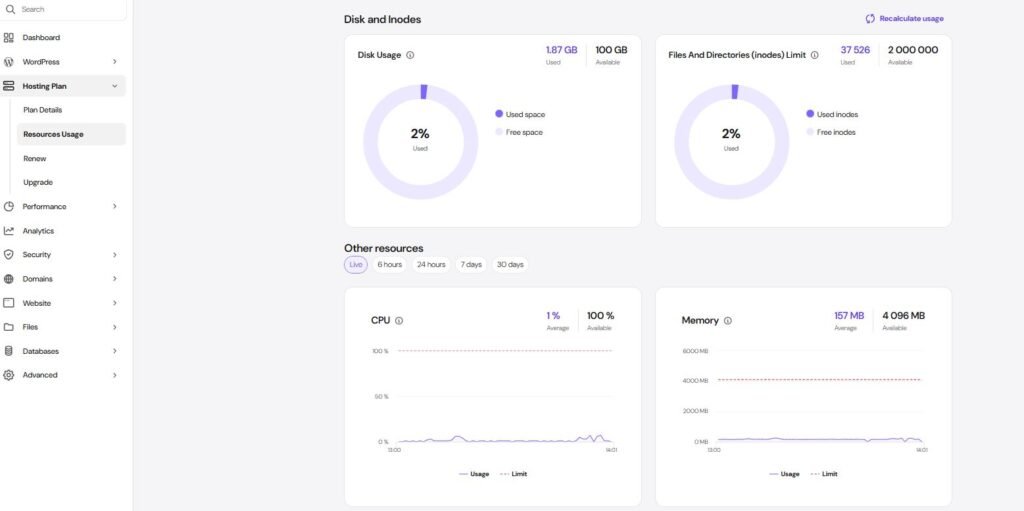
You’ll see:
✔ CPU usage
✔ RAM usage
✔ Disk usage
💡 Why this is IMPORTANT
This is the biggest difference from shared hosting
👉 You can actually see:
- When your site is under load
- When you need optimization
- When to upgrade
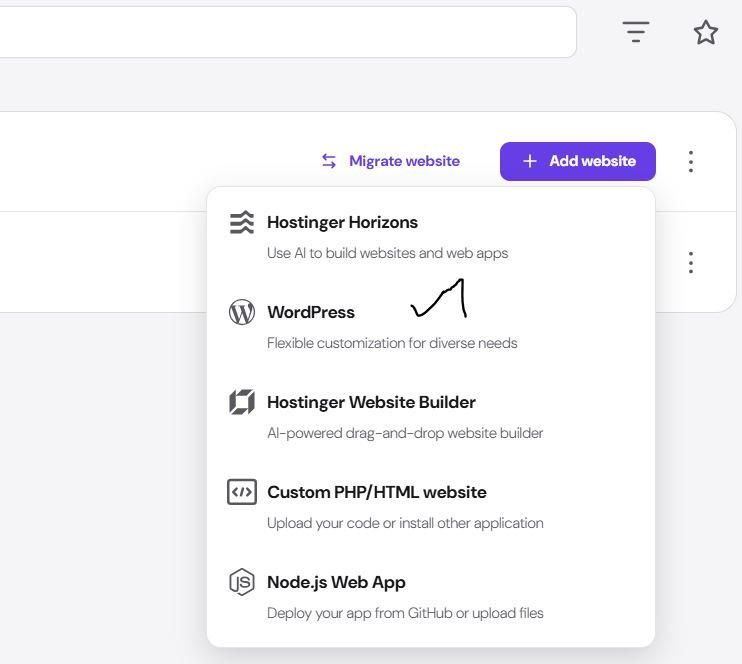
🏗️ STEP 5: Create Website (Correct Option)
Go to:
👉 Websites → Add Website
Select:
✔ Create New Website
✔ WordPress
🧩 STEP 6: Install WordPress (Do It Clean)
Fill:
✔ Website Name
✔ Admin Email
✔ Username
✔ Password
Click Install

⚠️ Common Mistake
❌ Installing heavy theme during setup
👉 Instead:
✔ Skip extras
✔ Keep install minimal
💡 Why:
Clean install = faster + easier optimization
🌍 STEP 7: Access Your Website Dashboard
Open:
👉 yourdomain.com/wp-admin
Login with your credentials
🧹 STEP 8: Clean Default Setup (Performance Step)
Go to:
👉 Appearance → Themes
✔ Keep 1 theme
❌ Delete others
Go to Plugins:
❌ Delete unused plugins
💡 Why this matters
Unused themes/plugins:
- Increase load time
- Create security risks
🔒 STEP 9: Enable SSL (Make Site Secure)
Go to:
👉 hPanel → Security → SSL
Click Install SSL
💡 What SSL does
✔ Enables HTTPS
✔ Secures user data
✔ Required for SEO (Google ranking)
🔁 STEP 10: Force HTTPS (Fix Mixed Content Issues)
Go to:
👉 WordPress → Settings → General
Change:
✔ http → https
Click Save

💡 If you skip this:
❌ Site may still load insecure version
❌ Browser shows warning
⚡ STEP 11: Install LiteSpeed Cache (Core Performance Tool)
- Go to Plugins → Add New
- Search: LiteSpeed Cache
- Install → Activate
💡 Why LiteSpeed?
Your server uses LiteSpeed technology
👉 This plugin connects directly to server → faster than normal caching plugins
🚀 STEP 12: Enable Cache (Basic Speed Setup)
Go to:
👉 LiteSpeed → Cache
✔ Cache → ON
✔ Browser Cache → ON
✔ Mobile Cache → ON
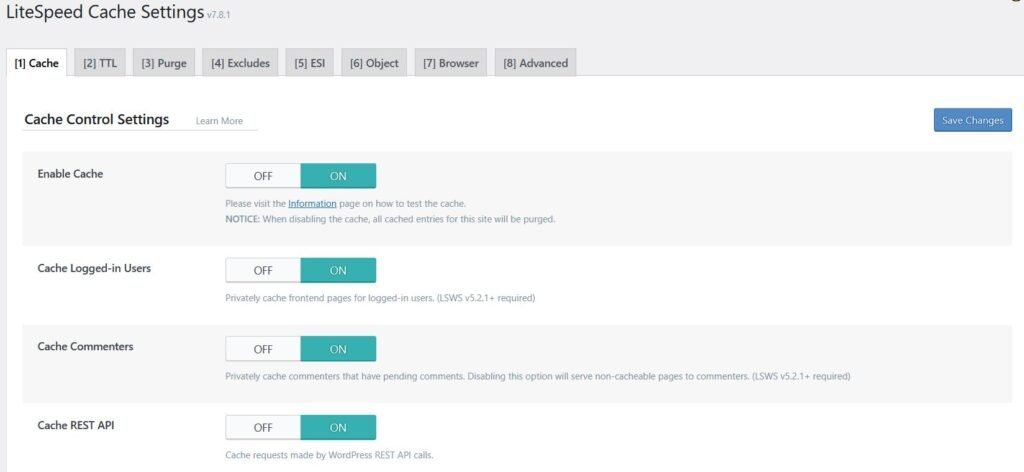
💡 What this does
✔ Stores static version of pages
✔ Reduces server load
✔ Makes site load faster
🧠 STEP 13: Enable Object Cache (Cloud Power Feature)
Go to:
👉 LiteSpeed → Cache → Object
✔ Object Cache → ON
Learn – Hostinger LiteSpeed Cache Settings (Best Configuration for Maximum Speed)
💡 Why this is powerful
- Uses server RAM
- Speeds up database queries
- Important for WooCommerce & dynamic sites
👉 This is where Cloud hosting shows real performance gain
🌍 STEP 14: Connect QUIC.cloud CDN (Global Speed Boost)
Go to:
👉 LiteSpeed → General
- Request Domain Key
- Connect QUIC.cloud
Enable:
✔ CDN
✔ Critical CSS
✔ Image optimization
💡 What CDN does
- Stores your site on global servers
- Visitors load site from nearest location
👉 Faster worldwide speed 🌍
🖼️ STEP 15: Image Optimization (Huge Speed Gain)
Go to:
👉 LiteSpeed → Image Optimization
✔ Optimize images
✔ Enable WebP
✔ Enable Lazy Load
💡 Why this matters
Images = biggest size on most websites
👉 Optimization can reduce load time by 40–60%
💾 STEP 16: Backup Setup (Safety System)
Go to:
👉 hPanel → Backups
✔ Download manual backup
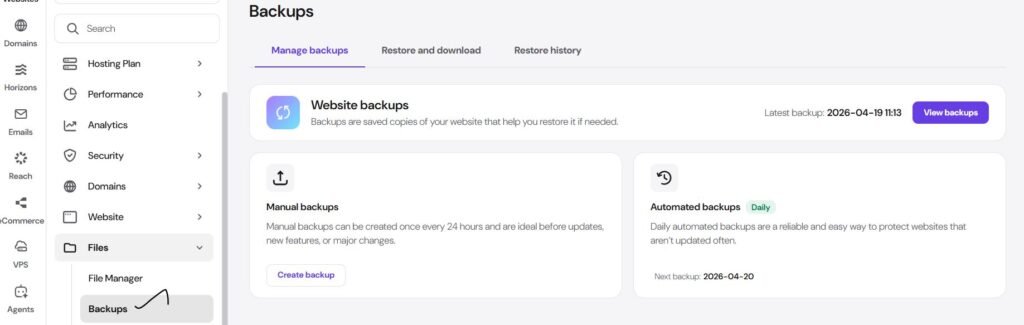
💡 Smart Backup Strategy
✔ Hostinger backup
✔ Plugin backup (UpdraftPlus)
✔ Store in cloud (Google Drive)
👉 Never depend on 1 backup only
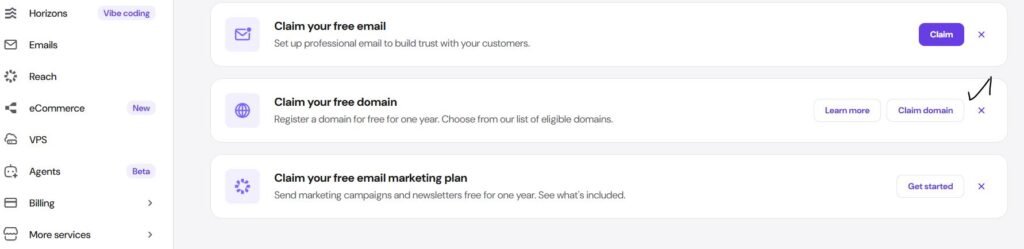
📧 STEP 17: Create Professional Email
Go to:
👉 Emails → Email Accounts
Create:
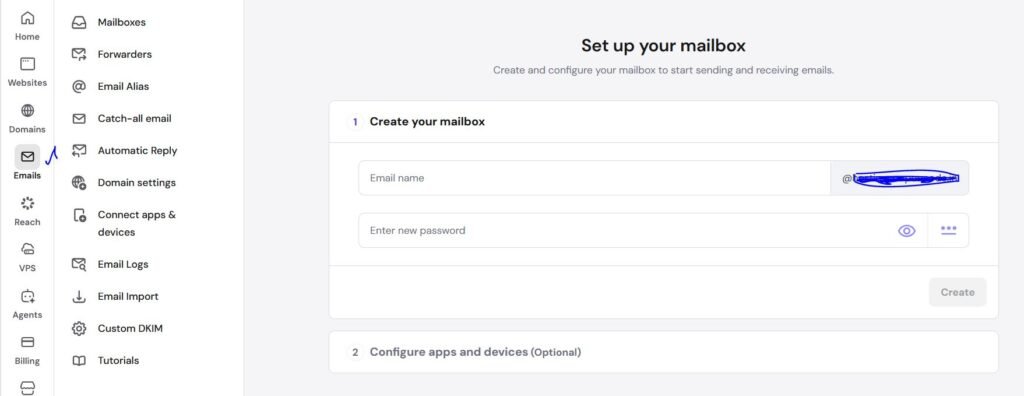
💡 Important Fix
Install:
✔ WP Mail SMTP
👉 Fixes:
❌ Emails going to spam
❌ Contact form not working
Useful Guide : How to Configure SMTP for WordPress (Fix Emails Going to Spam)
🔐 STEP 18: Security Setup (Must Do)
Install:
✔ Wordfence
Enable:
✔ Firewall
✔ Login protection
💡 Extra Security Tips
✔ Use strong password
✔ Update plugins regularly
✔ Remove unused plugins
🌐 STEP 19: Optional Cloudflare Setup (Extra Layer)
Add your domain to Cloudflare
Enable:
✔ Brotli
✔ HTTP/3
✔ Cache
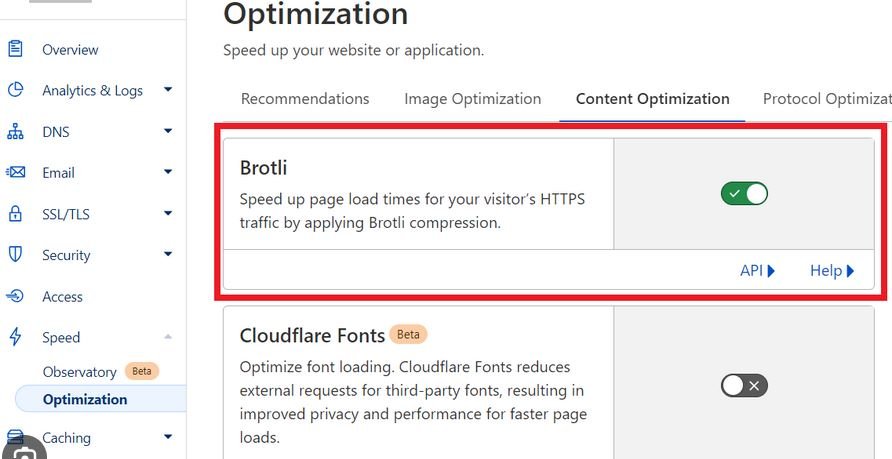
💡 Why use Cloudflare?
✔ Extra speed
✔ DDoS protection
✔ Better global performance
📊 STEP 20: Monitor Your Website (Cloud Advantage)
Go to:
👉 hPanel → Performance
Check:
✔ CPU usage
✔ RAM usage
✔ Traffic
💡 What to watch
If:
- CPU high → optimize plugins
- RAM high → heavy theme/plugins
- Traffic spike → consider upgrade
⚠️ Common Mistakes to Avoid
❌ Installing too many plugins
❌ Ignoring object cache
❌ Not optimizing images
❌ Using heavy themes
🔥 Final Optimization Checklist
✔ SSL enabled
✔ HTTPS forced
✔ LiteSpeed active
✔ Object Cache ON
✔ CDN connected
✔ Images optimized
✔ Clean plugins
🎯 Who Should Use Cloud Startup?
✔ Growing websites
✔ Online stores
✔ Business websites
✔ Medium to high traffic blogs
🎉 Best Result
After completing this guide:
✔ Website is live
✔ Fast loading
✔ Secure
✔ Ready for traffic
🚀 FAQ
The Hostinger Cloud Startup plan is a managed cloud hosting solution that provides dedicated CPU, RAM, and isolated resources, unlike shared hosting. It is best for users who need better performance and stability, such as growing blogs, business websites, and WooCommerce stores with moderate to high traffic.
To set up Hostinger Cloud Startup hosting, first purchase the plan, then claim your domain, access the hPanel dashboard, and install WordPress using the one-click installer. After that, enable SSL, configure LiteSpeed Cache, activate object cache, and connect a CDN like QUIC.cloud. Following these steps ensures your website is secure, fast, and ready for traffic.
Yes, the Cloud Startup plan is better than Business hosting because it offers dedicated resources, improved stability, and better performance under traffic. While Business hosting is suitable for small to medium websites, Cloud Startup is ideal for growing websites that need more power and consistent speed.
Yes, the Hostinger Cloud Startup plan includes a free domain (with annual plans) and a free SSL certificate. SSL can be activated from the hPanel dashboard and helps secure your website with HTTPS, which is important for both user trust and SEO rankings.
Instead of trying random or expired codes, you can use a tested and regularly updated coupon here: Redeem here