Hostinger Cloud Professional Setup Guide Step-by-Step


How to Set Up Hostinger Cloud Professional Plan (Step-by-Step Guide)
To set up the Hostinger Cloud Professional plan, purchase the plan, claim your domain, access hPanel, install WordPress, enable SSL, configure LiteSpeed Cache with object cache, and connect a CDN like QUIC.cloud or Cloudflare for high-performance optimization.
Cloud Professional plan
If you’ve upgraded to the Cloud Professional plan, you’re now using a high-performance cloud environment with dedicated resources.
👉 This guide will help you:
✔ Set up correctly
✔ Use advanced features
✔ Get maximum performance
🧠 What is Hostinger Cloud Professional Plan?
The Cloud Professional plan is a mid-high tier cloud hosting solution designed for high-traffic websites and serious online businesses.
👉 Key specs:
✔ 4 CPU cores
✔ 6 GB RAM
✔ 200 GB NVMe storage
✔ Dedicated IP
✔ 200 PHP workers
💡 What this means
- Handles heavy traffic easily
- Perfect for WooCommerce & large sites
- Much more stable than shared hosting
⚖️ Cloud Plan Comparison
| Plan | Performance | Best For |
|---|---|---|
| Cloud Startup | Medium | Growing sites |
| Cloud Professional | High | High traffic & ecommerce |
| Cloud Enterprise | Very High | Large-scale projects |
🛒 STEP 1: How to Buy Cloud Professional Plan?
- Go to Hostinger → Cloud Hosting
- Select Cloud Professional
- Click Add to Cart
👉 During checkout:
✔ Choose 24–48 months
✔ Select data center
✔ Apply coupon – Redeem Latest Discount 100% Working and Verified Coupons
✔ Complete payment
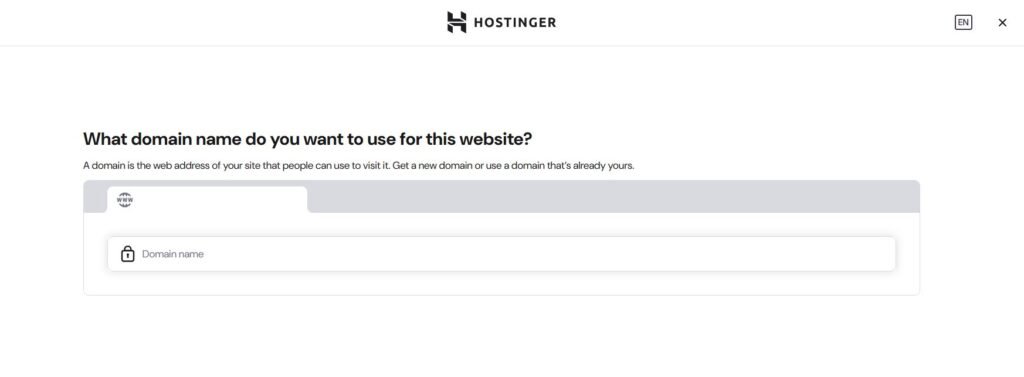
🌐 STEP 2: How to Claim Domain in Hostinger?
- Click Claim Domain
- Enter domain name
- Register
👉 Includes:
✔ Free domain
✔ Free SSL
✔ Email accounts
⚙️ STEP 3: How to Access Cloud Dashboard?
Go to:
👉 hPanel → Hosting → Manage
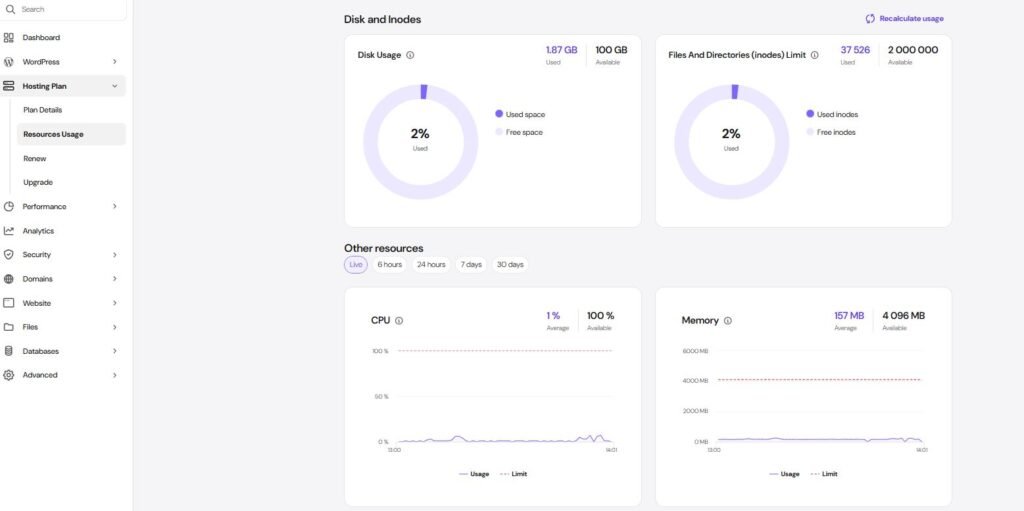
You’ll see:
✔ CPU usage
✔ RAM usage
✔ Performance metrics
💡 Why this matters
Cloud hosting gives resource visibility (not available in shared hosting)
🏗️ STEP 4: How to Create Website?
👉 Websites → Add Website
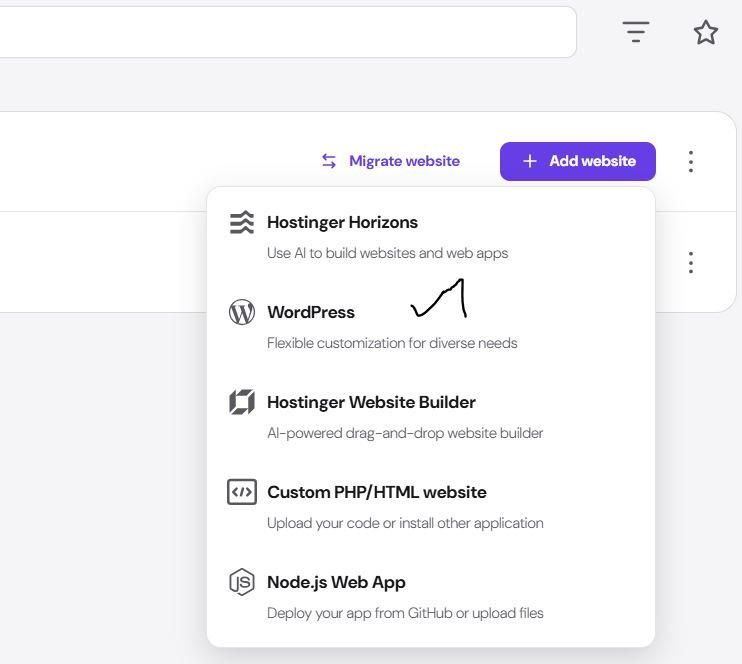
Select:
✔ WordPress (recommended)
🧩 STEP 5: How to Install WordPress?
Fill:
✔ Site name
✔ Email
✔ Username
✔ Password
Click Install
💡 Pro Tip
Skip heavy themes during install → improves speed later
🔒 STEP 6: How to Enable SSL?
👉 hPanel → Security → SSL → Install
✔ Activates HTTPS
💡 Why important
✔ SEO ranking
✔ Secure data
✔ Trust signal
⚡ STEP 7: LiteSpeed Cache Setup (CRITICAL)
Install plugin:
✔ LiteSpeed Cache
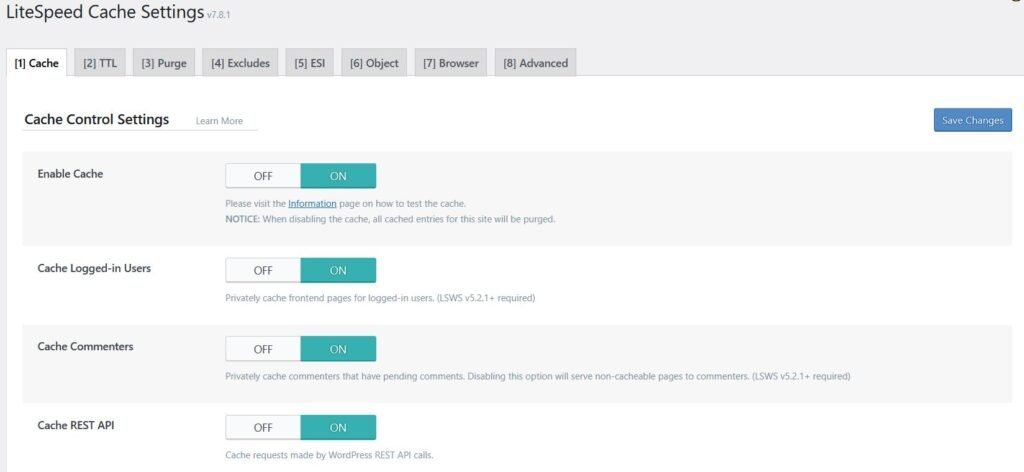
Enable:
✔ Cache ON
✔ Browser cache ON
🧠 STEP 8: Enable Object Cache (Cloud Advantage)
👉 LiteSpeed → Cache → Object
✔ Enable Object Cache
Learn : Hostinger LiteSpeed Cache Settings
💡 Why this matters
- Uses RAM instead of database queries
- Improves speed under load
- Essential for WooCommerce
🚀 STEP 9: CDN Setup (QUIC.cloud / Cloudflare)
Cloud hosting includes CDN support
✔ QUIC.cloud (best for LiteSpeed)
✔ Cloudflare (global performance)
👉 CDN improves loading speed by storing content globally
Learn : WordPress Optimization Guide (2026 Complete Speed Tutorial)
🖼️ STEP 10: Image Optimization
Enable:
✔ WebP
✔ Lazy load
✔ Compression
👉 Reduces load time significantly
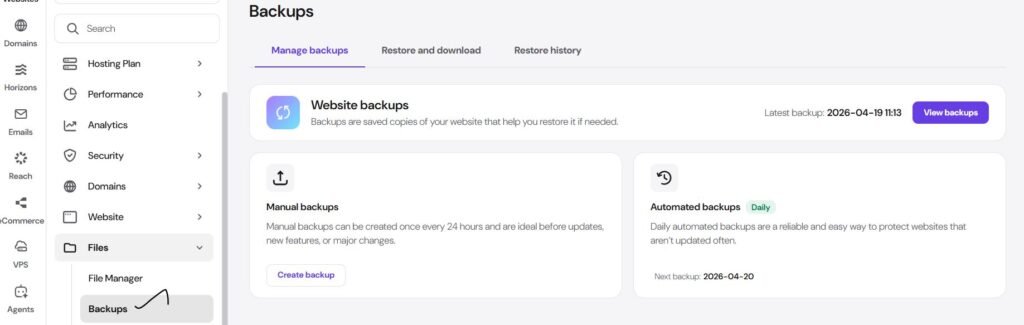
💾 STEP 11: Backup Setup
✔ Automatic backups included
✔ Download manual backup
📧 STEP 12: Email Setup
👉 Emails → Create
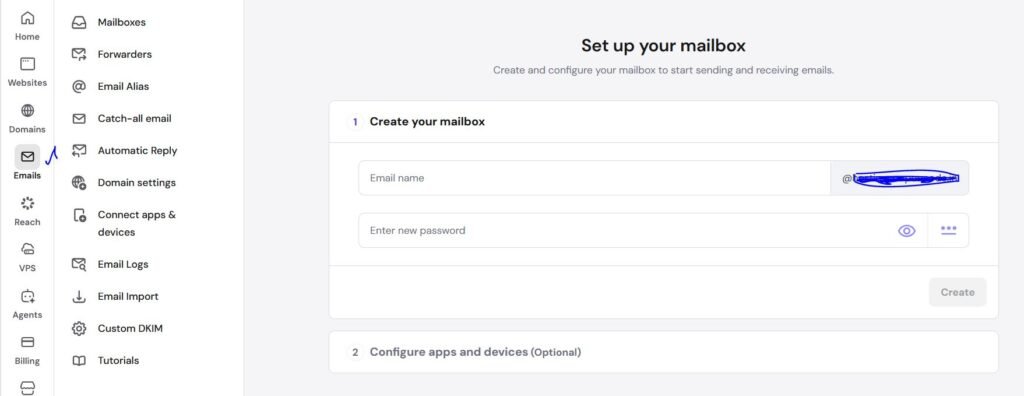
✔ Professional email
✔ Domain-based
🔐 STEP 13: Security Setup
Install:
✔ Wordfence
Enable:
✔ Firewall
✔ Login protection
📊 STEP 14: Monitor Performance (VERY IMPORTANT)
👉 hPanel → Performance
Track:
✔ CPU usage
✔ RAM usage
💡 When to upgrade
✔ High CPU usage
✔ Traffic spikes
✔ Slow performance
⚠️ Common Mistakes to Avoid
❌ Not using object cache
❌ Installing too many plugins
❌ Ignoring CDN
❌ Using heavy themes
🔥 Final Optimization Checklist
✔ SSL enabled
✔ Cache active
✔ Object cache ON
✔ CDN connected
✔ Images optimized
Related Guide
- Hostinger Premium Plan Setup Guide
- Hostinger Business Hosting Guide
- Hostinger Cloud Startup Setup Guide
❓ FAQ
The Cloud Professional plan is best for high-traffic websites, ecommerce stores, and businesses that need stable performance and dedicated resources.
Yes, Cloud Professional offers more CPU, RAM, and storage, making it better for handling larger traffic and complex websites.
Yes, it includes a free domain, SSL certificates, email accounts, and backups with annual plans.
No, it is fully managed hosting with an easy hPanel dashboard, so beginners can use it easily.
Cloud hosting offers up to 4x speed and 20x more resources compared to traditional hosting, making it ideal for performance-focused websites
🎯 RESULT
After setup:
✔ High-performance website
✔ Handles heavy traffic
✔ Fully optimized environment