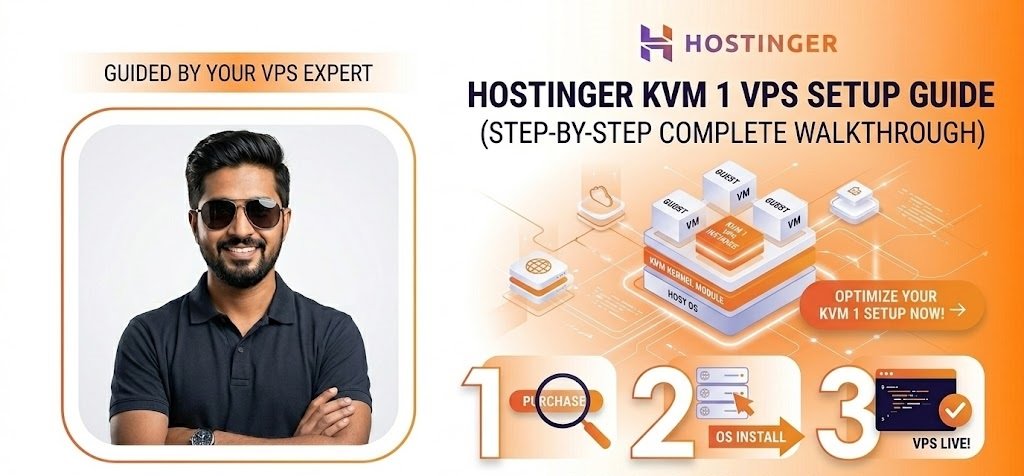
Hostinger KVM 2 VPS Step-by-Step Tutorial
Hostinger KVM 2 VPS Setup Guide 2026: Complete Step-by-Step Tutorial
What is Hostinger KVM 2 VPS?
Hostinger KVM 2 is a virtual private server plan designed for users who need more power than entry-level VPS hosting.
It gives you:
- 2 vCPU cores
- 8 GB RAM
- 100 GB NVMe storage
- 8 TB bandwidth
- Full root access
- Weekly backups
- Firewall management
- 1 Gbps network speed
Hostinger lists KVM 2 with 2 vCPU cores, 8 GB RAM, 100 GB NVMe disk space, and 8 TB bandwidth, making it a strong middle option between KVM 1 and higher VPS plans.
Who Should Use KVM 2 VPS?
KVM 2 is best for users who want more stability and resources than KVM 1.
You can use it for:
- WordPress websites
- WooCommerce stores
- Multiple small websites
- n8n automation
- OpenClaw AI assistant hosting
- Docker applications
- Custom web apps
- Client projects
Hostinger also recommends VPS-level resources like 2–4 vCPU cores and 4–8 GB RAM for stable production automation workloads such as n8n, and KVM 2 fits that range well.
KVM 1 vs KVM 2: What is the Difference?
| Feature | KVM 1 | KVM 2 |
|---|---|---|
| CPU | 1 vCPU | 2 vCPU |
| RAM | 4 GB | 8 GB |
| Storage | 50 GB NVMe | 100 GB NVMe |
| Bandwidth | 4 TB | 8 TB |
| Best For | Learning, small sites | WordPress, apps, automation |
If you are only learning VPS, KVM 1 is enough.
But if you want to run WordPress, WooCommerce, Docker, n8n, or OpenClaw more smoothly, KVM 2 is the better choice.
Step 1: Buy Hostinger KVM 2 VPS
First, go to the VPS hosting section and choose KVM 2.
During checkout:
- Select KVM 2 VPS
- Choose 12-month or 24-month plan
- Create or log in to your account
- Apply coupon code
Get Best Discount KVM 2 Coupon Code From Our Verified Link – Redeem Now
5. Complete payment
After purchase, open your VPS dashboard.
Step 2: Open VPS Dashboard
After payment:
- Login to hPanel
- Go to VPS
- Click Manage on your KVM 2 server
Here you can see:
- Server IP address
- Root username
- Password
- Operating system
- Server status
- Resource usage
This dashboard is important because you will use the IP address to connect your server through SSH.
Step 3: Install Ubuntu on KVM 2 VPS
For beginners, Ubuntu is the easiest operating system.
Recommended OS:
Ubuntu 24.04 LTS
Steps:
- Go to VPS dashboard
- Open Operating System section
- Choose Ubuntu 24.04 LTS
- Click Install / Change OS
- Wait until installation finishes
Ubuntu LTS is stable, beginner-friendly, and works well with WordPress, Docker, n8n, and OpenClaw.
Step 4: Connect VPS Using SSH
SSH allows you to control your VPS from your computer.
For Windows
Use:
- Windows Terminal
- PuTTY
Command:
ssh root@your_server_ipExample:
ssh root@123.45.67.89Enter your root password when asked.
For Mac / Linux
Open Terminal and run:
ssh root@your_server_ipIf you connect successfully, you are now inside your VPS.
Step 5: Update Your Server
Before installing anything, update the server packages.
Run:
apt update && apt upgrade -yWhy this matters:
- Fixes security issues
- Updates old packages
- Prevents installation errors
Step 6: Create a New Sudo User
Do not use root account for daily work.
Create a new user:
adduser adminuserAdd user to sudo group:
usermod -aG sudo adminuserNow this user can run admin commands safely.
Step 7: Secure SSH Login
Open SSH config:
nano /etc/ssh/sshd_configFind:
PermitRootLogin yesChange to:
PermitRootLogin noRestart SSH:
systemctl restart sshImportant: Before closing current session, test login with your new user.
Step 8: Enable Firewall
Install and enable UFW firewall:
apt install ufw -yAllow SSH:
ufw allow OpenSSHAllow web traffic:
ufw allow 'Nginx Full'Enable firewall:
ufw enableCheck status:
ufw statusStep 9: Install NGINX Web Server
Install NGINX:
apt install nginx -yStart and enable it:
systemctl start nginx
systemctl enable nginx
Now open your VPS IP in browser:
http://your_server_ipIf you see the NGINX welcome page, your web server is working.
Step 10: Install PHP and Required Extensions
Install PHP and common WordPress extensions:
apt install php-fpm php-mysql php-curl php-gd php-mbstring php-xml php-xmlrpc php-soap php-intl php-zip unzip -yCheck PHP version:
php -vStep 11: Install MySQL Server
Install MySQL:
apt install mysql-server -ySecure MySQL:
mysql_secure_installationRecommended answers:
- Validate password plugin: optional
- Remove anonymous users: yes
- Disallow remote root login: yes
- Remove test database: yes
- Reload privilege tables: yes
Step 12: Create WordPress Database
Login to MySQL:
mysqlCreate database:
CREATE DATABASE wordpress_db DEFAULT CHARACTER SET utf8mb4 COLLATE utf8mb4_unicode_ci;Create user:
CREATE USER 'wordpress_user'@'localhost' IDENTIFIED BY 'StrongPasswordHere';Give permission:
GRANT ALL ON wordpress_db.* TO 'wordpress_user'@'localhost';Apply changes:
FLUSH PRIVILEGES;
EXIT;
Step 13: Download WordPress
Go to web directory:
cd /var/www/Download WordPress:
wget https://wordpress.org/latest.tar.gzExtract:
tar -xvzf latest.tar.gzRename folder:
mv wordpress yourdomain.comSet permissions:
chown -R www-data:www-data /var/www/yourdomain.com
chmod -R 755 /var/www/yourdomain.com
Step 14: Configure NGINX for Domain
Create config file:
nano /etc/nginx/sites-available/yourdomain.comAdd:
server {
    listen 80;
    server_name yourdomain.com www.yourdomain.com;

    root /var/www/yourdomain.com;
    index index.php index.html index.htm;

    location / {
        try_files $uri $uri/ /index.php?$args;
    }

    location ~ \.php$ {
        include snippets/fastcgi-php.conf;
        fastcgi_pass unix:/run/php/php8.3-fpm.sock;
    }

    location ~ /\.ht {
        deny all;
    }
}
Enable site:
ln -s /etc/nginx/sites-available/yourdomain.com /etc/nginx/sites-enabled/Test NGINX:
nginx -tRestart NGINX:
systemctl restart nginxStep 15: Connect Domain to VPS
Go to your domain DNS settings and add:
| Type | Name | Value |
|---|---|---|
| A | @ | Your VPS IP |
| A | www | Your VPS IP |
Wait for DNS propagation.
Usually it takes a few minutes, but sometimes it can take longer.
Step 16: Install SSL Certificate
Install Certbot:
apt install certbot python3-certbot-nginx -yRun SSL setup:
certbot --nginx -d yourdomain.com -d www.yourdomain.comChoose redirect HTTP to HTTPS.
Now your website will load with HTTPS.
Step 17: Complete WordPress Installation
Open your domain:
https://yourdomain.comEnter:
- Database name
- Database username
- Database password
- Database host: localhost
Then create your WordPress admin account.
Your WordPress site is now live on KVM 2 VPS.
Step 18: Install Docker for Apps Like OpenClaw or n8n
KVM 2 is useful because it can run Docker apps more comfortably than KVM 1.
Install Docker:
apt install docker.io docker-compose -yStart Docker:
systemctl start docker
systemctl enable docker
Check version:
docker --versionYou can now use this VPS for:
- n8n
- OpenClaw
- Node.js apps
- automation tools
- custom containers
Hostinger notes that VPS plans are suitable for demanding workloads such as eCommerce platforms, SaaS applications, AI tools, and custom web apps.
Step 19: Basic Performance Optimization
Install cache plugin inside WordPress:
- LiteSpeed Cache
- WP Rocket
- W3 Total Cache
For VPS-level optimization:
apt install htop -yCheck resource usage:
htopAlso optimize:
- Images
- Database
- Plugins
- CDN
- PHP memory limit
Step 20: Setup Backups
Do not depend only on manual backups.
Use:
- Hostinger weekly backups
- WordPress backup plugin
- Remote backup storage like Google Drive
Hostinger VPS plans include weekly backups, and Ubuntu VPS pages mention weekly backups and real-time snapshots for data safety.
Step 21: Monitor Server Health
Useful commands:
df -hShows disk usage.
free -mShows RAM usage.
topShows running processes.
systemctl status nginxChecks NGINX status.
systemctl status mysqlChecks MySQL status.
Step 22: Common Mistakes to Avoid
Avoid these mistakes:
- Using root login forever
- Not enabling firewall
- Forgetting SSL
- Using weak passwords
- Installing too many apps on one VPS
- Not monitoring RAM
- Not setting backups
- Running production apps without updates
Step 23: When Should You Upgrade from KVM 2?
Upgrade to KVM 4 if:
- CPU usage is always high
- RAM is above 80% most of the time
- WooCommerce becomes slow
- You run multiple Docker apps
- You run multiple AI agents
- You need more storage
KVM 2 is a strong starting point, but KVM 4 gives more room for heavy workloads.
Final Checklist
Before finishing, confirm:
- Ubuntu installed
- SSH working
- New sudo user created
- Root login disabled
- Firewall enabled
- NGINX installed
- PHP installed
- MySQL installed
- WordPress installed
- Domain connected
- SSL enabled
- Backups configured
- Monitoring commands tested
FAQs
Yes, KVM 2 is good for WordPress because it provides 2 vCPU cores, 8 GB RAM, and 100 GB NVMe storage, which is enough for growing WordPress websites and small WooCommerce stores.
Yes, KVM 2 is better than KVM 1 if you need more RAM, more CPU power, more storage, and better performance for WordPress, Docker apps, automation tools, or business websites.
Yes, KVM 2 is suitable for OpenClaw because it has enough RAM and CPU for AI assistant workloads, Docker containers, and background services.
Yes, KVM 2 is a good option for n8n. Hostinger says KVM 2 exceeds recommended production-level n8n requirements with 2 vCPU cores, 8 GB RAM, 100 GB NVMe storage, and 8 TB bandwidth.
You do not need coding knowledge, but you should be comfortable copying commands into SSH. VPS hosting gives more control than shared hosting, so basic Linux command knowledge is helpful.
Ubuntu 24.04 LTS is a good choice for beginners because it is stable, widely supported, and works well with WordPress, Docker, n8n, and OpenClaw.
Related Guide
Hostinger KVM 1 VPS Setup Guide (Step-by-Step Beginner Tutorial – 2026)